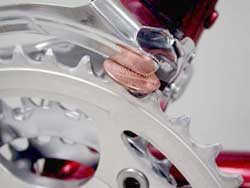
The front derailleur cage should be approximately parallel to the
chain. If the derailleur cage is rotated too far from this position, it
will shift poorly. If the derailleur mount is a clamp type, its rotation
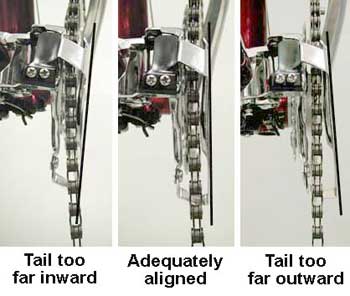
can be changed. Generally, the outer cage of the front derailleur should
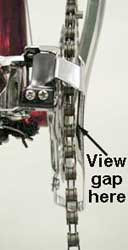
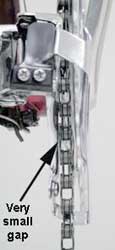
be aligned to the chain. The middle image below shows adequate
alignment.
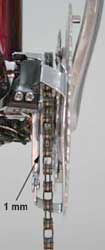
- Shift chain to outermost chain ring and outermost rear sprocket.
- Sight chain from directly above chain rings. Consider the chain as
representing a straight line. Compare this line to outer derailleur cage
plate. Outer cage plate and chain should be parallel. Keeping the cage
and chain parallel will minimize the risk of the chain jumping off the
outermost ring. If cage is not parallel, there will be a relatively
large gap at either the back or the front end of the cage, and the chain
may over shift.
- If derailleur cage needs to be rotated, note direction of desired
rotation.
- Release inner wire tension by shifting to the innermost chain ring.
- Many clamps leave a slight marking on the frame. Use this scarring
as a reference when changing height. It is also possible to use a pencil
to make two reference marks on the frame, one for height and a second,
vertical mark, to reference rotation. Use the marks to avoid
inadvertently changing height.
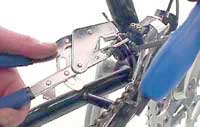
- Loosen clamp bolt and slightly rotate in correct direction. Use care
not to change height. Tighten derailleur clamp bolt.
- Shift to outer chain ring and observe rotation alignment. Repeat
adjustment if necessary.
NOTE: Some front derailleur models do not have height or rotation
adjustments. These models mount on a plate and both height and rotation
settings are pre-set. Additionally, some bikes have a bracket commonly
referred to as a "braze-on" for front derailleur mounting. This bracket
will allow limited height and rotational settings.
Front Derailleur Limit Screw Settings
Limit screws stop the inward and outward travel of the front derailleur
cage. Limit screws are marked "L" and "H". The L-screw will stop the
motion of the derailleur toward the smallest chain ring. The H-screw will
stop the motion of the derailleur toward the largest chain ring.
If the limit screws lack any marking, you will need to determine which
are the "H" and "L" by testing. Begin with the chain on the smallest cog.
Relax the cable tension completely using the cable barrel adjuster. Place
a hand on the derailleur body to feel for any lateral motion, and select
one screw to turn one full turn clockwise and then counter-clockwise. If
you felt motion in the derailleur, this is the "L" screw. If there was no
motion, do the same test with the other limit screw. You should consider
marking the "L" screw permanently. The other screw by default is the "H"
screw.
Although the limit screws will stop the derailleur, it is the inner
wire and derailleur spring that make the derailleur move. If the inner
wire has too much tension, the derailleur will not rest on the L-screw
stop. If the inner wire tension were to change, the derailleur inner limit
would also change, possibly causing the chain to fall off the rings.