![]() |
Branford Bike
129 Sagittarius Skyway, PO Box 1711, Emigrant, MT 59027 USA |
| Click on the underlined text to: | |
| order online via our Secure Order Form and receive FREE... | |
| or send us an email with your questions or comments. | |
|
Phone Answering Hours M-W-F, 12 noon - 3 PM Mountain Time Information: (203) 488-0482 FAX: (203) 643-8078 |
|
Hubs and Derailleurs Section: Page 16
Click on an underlined item or scroll down this page to view everything.
Order online via our
- Secure Order Form -
and receive FREE...
|
![]() |
Level of Difficulty
|
|
Tools and Supplies This article will discuss derailleur hanger alignment and use of the Derailleur Alignment Gauge Park DAG-1. See also related articles:
|
|
Aligning Rear Derailleur Hangers A mis aligned derailleur hanger will often result in poor shifting performance. A common cause of a mis aligned hanger is from the bike falling over to the right side. This pushes the derailleur body inward, bending the hanger.
It is often possible to repeatedly re-bend many derailleur hangers. This is because there is very little stress from riding the bike or shifting gears. As a rule of thumb, if a hanger survives a repair by bending, it will survive use. However, there are some hangers that do not repair well. Extremely thick hangers and titanium hangers are difficult and sometimes impossible to repair. Bolt-on type hangers that are replaceable are align able. However, these types of hangers can be tricky to align if the clamping design of the hanger to the frame is less than adequate It is common for these type of replaceable hanger to move in the mount.
After aligning and correcting the derailleur hanger, it will be necessary to check all rear derailleur adjustment, including limit screw and index settings. For rear derailleur adjustments see Rear Derailleur Adjustment. |
|
Using the Park Derailleur Alignment Gauge 
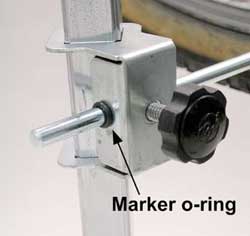
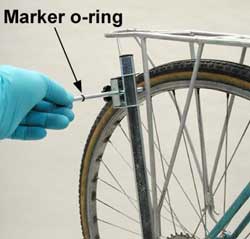
Note: Newer DAG-1 models will now come with 2 o-rings for the slider. These will help prevent slider from falling out and can be used as markers when racks or fenders prevent full DAG-1 rotation. This procedure will be described at the end of this article.
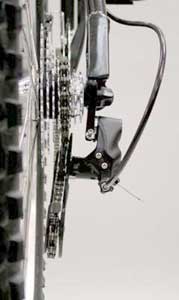
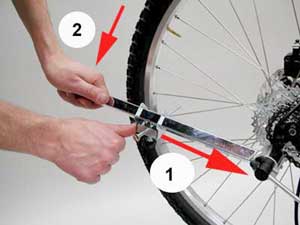
Begin by mounting the bike in a repair stand with the wheels level as the bike would appear on flat ground. Check that the rear wheel that is mounted straight in the frame. The wheel does not need to be dished or 
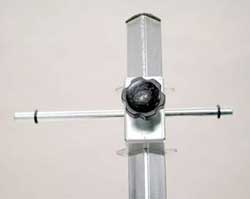
true for use of the tool. Remove rear derailleur. Install DAG-1 and tighten handle. NOTE: Do not use the DAG-1 threads as a "chaser" of bad derailleur hanger threads. Chase and clean the threads using the Park Tool 10 x 1mm, TAP-10. 
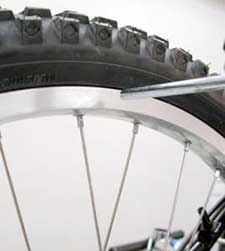
Rotate the arm toward the left side of rim, at the "9:00 o'clock" position. Rotate the tire valve to the 9:00 position. Use this point on the rim as a constant reference when checking the hanger. By checking the same point on the rim, wheel trueness or dish will not affect alignment.
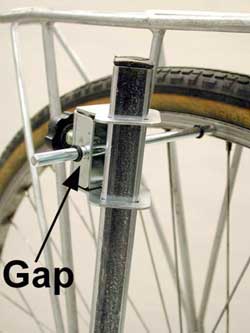
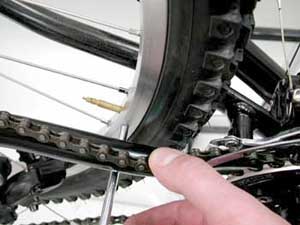
Loosen the sliding gauger knob and move the sliding gauge to contact rim and secure knob.
Slide gauge bracket towards hub before rotating arm. This prevents gauge from begin forced against rim.
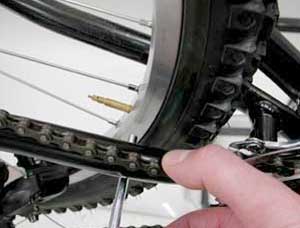
Rotate DAG-1 and rotate rim valve 180 degrees to the 3:00 position. Slide indicator toward rim to same point near valve. 
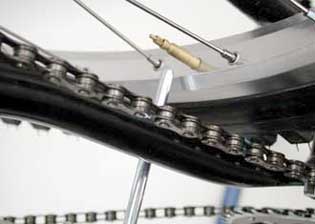
There are three possible results.
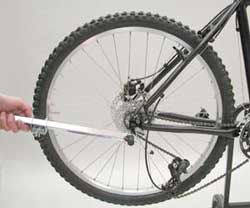
When bending hanger, it is best to bend small in amounts and re-check. The amount of error is actually one-half the gap between gauge and rim. As the gap is closed, it increases at the reference point 180 degrees away. Bend a bit, re-check both side, and then re-bend a bit more. Generally, it is best by having the DAG-1 arm next to the chain stay. This allows you to use the stay for leverage and control the amount of bending either inward or out. Repeat bending and checking until the gap is less then 4mm. Use a 4mm hex wrench as a "go-no go" gauge. 
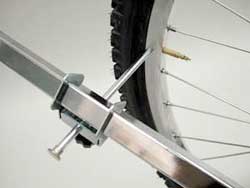
After getting the horizontal aligned, check and aligned, move on to check the 6:00 and 12:00 position. Set gauge to 6:00 position, then check at 12:00 position.
Again, bend only one-half the amount of gap. Reset pointer at each bending of hanger. When gap is less then 4mm, keep same the setting and check 3:00 position. If three points 90 degrees apart are within 4mm, hanger is aligned. Continue aligning as necessary. |
|
Rack or Fender Interference There may be fenders, racks or other situations where it the gauge is blocked from rotating to the various points. The newer DAG-1 models use two o-rings to hold the gauge in place. This helps prevent loose of the gauge. Additionally, the o-rings can be used as markers, allowing the gauge position to be accurately referenced, the gauge moved to pass the obstacle, and then the gauge returned to its original position. Below is an example of a bike with a rack the prevents DAG-1 rotation.
Push outer o-ring to slider. This marks the position of the gauge relative to the slider.
When the gauge cannot pass by a frame stay, fender stay, or rack, loosen gauge knob and pull gauge back to clear.
Return the gauge so the o-ring is back in the original position. In the image below, the gauge is contacting the rim, but the o-ring is positioned away from the slider. In this situation, the gauge would be resting inside the rim. There will be situations where the o-ring contacts the slider, but there will be a gap between rim and gauge end.
|
| Information and photos are courtesy of Park Tool. Visit their site at ParkTool.Com |
Campagnolo Derailleur Parts, Tools, Maintenance and Tool Use Tips:
|
| 100% Satisfaction Guaranteed
At Branford Bike we want you to be happy and satisfied with everything you purchase from us. We understand that sometimes you will need to return a product because it was not quite what you wanted. You may return anything you purchase from us within 60 days and unused, for an immediate exchange or refund. |
| Click on the underlined text to go to the... |
|
Page 15 Rear Derailleur Overhaul |
Hubs Table of Contents |
Branford Bike Catalog Main Table of Contents |
Page 17 Frame and Fork Dropout Alignment |
|
Branford Bike Catalog Index Quickly find an item or see everything that is in our catalog. |
|
Order Online via our Secure Order Form and receive FREE expedited processing with email confirmations.
Our Secure Order Form is easy to use. Simply fill in the boxes as you would for a traditional paper catalog
order form.
|
|
Branford Bike Online Catalog - Archival Edition brought to you by the former owner of Branford Bike, Tim Brockett via his personal web site, TimsLife.Com |
|
This is an archival edition of the Branford Bike web site from February 2006. Complete with product photos, prices, how to articles and technical specifications it is a treasure trove of accurate, detailed and historical information. In July of 2006 Branford Bike was incinerated by a huge forest fire. No one was hurt but the inventory and buildings were completely destroyed. I witnessed the fire and stayed until the trees were burning in my driveway. At that point I hiked from Branford Bike, through the smoke and embers, down the mountain to my Jeep 3 miles away. I took photos and wrote about the harrowing experience so everyone could see what I saw. My insurance was generous and I later rebuilt my home and started another business selling books. Read the story here. Branford Bike was a huge part of my life for over 30 years; June 1976 to July 2006. I enjoyed those years tremendously and Branford Bike was often a labor of love. I hope you enjoy browsing through the archival catalog. If your visit brings back pleasant memories please share them with me via e-mail at timbrockett@gmail.com . If you find any printed Branford Bike catalogs, advertisments or flyers please scan them as a PDF and email. Or you may mail them via US Post to Tim Brockett, PO Box 1711, Emigrant, MT 59027. Eventually I will post them in a Memorabilia catalog section. Many Thanks and Best Wishes, Tim Brockett |
| Go to our Secure Ordering Page |
|
For more information, call: (203) 488-0482 Our phone hours are: Monday, Wednesday & Friday, 12 noon - 3 pm Mountain Time To print this page in Netscape Navigator or Microsoft Explorer: |