![]() |
Branford Bike
129 Sagittarius Skyway, PO Box 1711, Emigrant, MT 59027 USA |
| Click on the underlined text to: | |
| order online via our Secure Order Form and receive FREE... | |
| or send us an email with your questions or comments. | |
|
Phone Answering Hours M-W-F, 12 noon - 3 PM Mountain Time Information: (203) 488-0482 FAX: (203) 643-8078 |
|
Hubs and Derailleurs Section: Page 18
Click on an underlined item or scroll down this page to view everything.
Order online via our
- Secure Order Form -
and receive FREE...
|
![]() |
Level of Difficulty
|
Tools and Supplies
This article will discuss frame alignment and the use of the Frame Alignment Gauge Park Tool Frame Alignment Gauge. Frame alignment issues and repairs are best addressed by professional mechanics and frame builders. If your frame does not ride quite "right", it is worth having the alignment checked by these professionals. Frame alignment is also related to wheel dropout alignment. The use of dropout alignment tools Park Tool FFG-1's is discussed at Dropout Alignment Procedure. Generally, dropout alignment should be inspected after checking the frame. Common frame alignment issues arise from the rear triangle being mis aligned relative to the front triangle. Procedures to check front triangle alignment are discussed at the end of this article. Frame alignment is important to the performance of the bicycle. Frame misalignment may result in the following problems:
However, it is important to keep in mind that a bike or frame need not be "perfectly" aligned to perform well. All manufactured components and frames are made to certain tolerances. Frame alignment should be checked in order to address specific issues and symptoms. It is not typically measured and addressed as an issue in its own right. If a bike is not showing alignment symptoms, it probably does not need "fixing". The Park Tool Frame Alignment Gauge Frame Alignment Gauge acts much in the same way as a wheel dishing tool. One side of the bike is check for symmetry against the other side. If the rear part of the bike, the rear triangle, is off either left or right, it will show by using the Frame Alignment Gauge. In the image below, the left side is being referenced and then compared to the right. The rear triangle on this bike is off toward the left side of the bike's mid-line.
|
Important NoteIt is possible to cold-set or re-bend only certain frames when correcting alignment problems. Some frame material is either too rigid or too fragile to bend. When a frame is bent for alignment, you must exceed the "yield" point of the material. This is the point were the material will bend and then stay permanently deformed. In some materials, the point at which it will yield is very close to the point where it will simply fail and break. Thin aluminum tubing, as an example, should generally not be bent. Carbon fiber frames, such as the one seen below, will not take a cold-set. This material tends to simply flex, and then at some point, break. If in doubt, check with the frame manufacturer. |
|
Frame Alignment Procedures Begin frame alignment by measuring the width of the hub over the locknuts. Measure from locknut face to locknut face, where the nuts would contact the frame dropouts. Write this number down for reference.
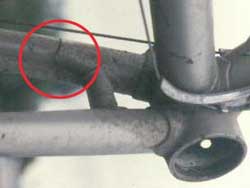
Also note the left and right dropout thickness. If either side is different, record the difference and account for this difference when measuring the frame. For example, the replaceable hanger seen below makes the right dropout effectively 2mm thicker than the left side. When this example frame is centered, the Frame Alignment Gauge will show a 2mm gap between the pointer and left side dropout.
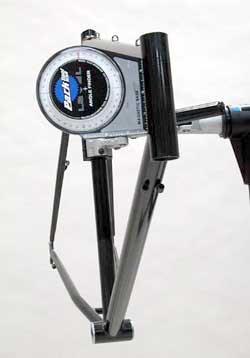
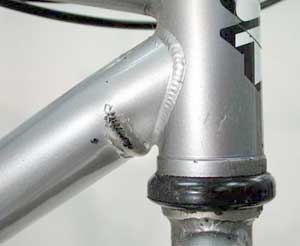
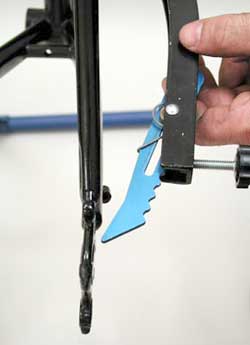
Place the long straight portion of the Frame Alignment Gauge along side the left side
of the head tube and the seat tube. Make certain the gauge rests on the
tubes themselves, not head lugs, welds, bottle cages, etc. Slide the
adjustable pointer as necessary to adjust for variations in chain stay
length. Turn the pointer knob until the pointer contacts the dropout
face.
NOTE: Large down tubes on small frames may make it difficult to contact head tube. In these cases it is possible to extend the width of the head tube by holding a shim, such as a hex key wrench, held flat against head tube. This allows an accurate measurement from the head tube. Additionally, some bikes have no seat tube. In these cases, it may be possible to lower the seat post and use the seat post as a representation of seat tube. After referencing the left side of the bike, compare this setting to the right side. Set the Frame Alignment Gauge to contact the same three points on right side, mirroring the tool placement at the head tube, seat tube, and rear dropout. There are three possible results of this comparison:
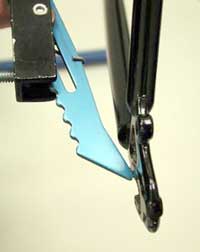
To cold set the frame, it is best to hold bike securely by the bottom bracket. A simple method to do this is to remove the bottom bracket, and install steel adjustable-type bottom bracket cups. Both cups should extend past shell. Mount bottom bracket in the hard jaws of a large vise. The cups will protect the frame.
When bending the dropout and stays, it is best to begin with mild hand pressure. Check progress by re-checking frame width with a caliper and centering with the Frame Alignment Gauge. Increase pressure as necessary.
When bending a frame, bend one stay at a time as necessary. Always consider hub width and frame width when aligning rear triangle. Use the Frame Alignment Gauge and a caliper together to help minimize the amount of bending necessary. It is common for the one stay to move slightly when the other stay is pulled. This is because the stays are joined with a bridge near the bottom bracket and on the seat stay. Centering tolerance for Frame Alignment Gauge pointer-to-dropout gap is generally considered 1-2mm. Adequate tolerance for frame width-to-hub difference is also generally considered 1-2mm. However, bikes can certainly perform adequately with even greater error than these numbers. Check with the frame manufacturer for specific tolerances. |
|
Main Frame The head tube, top tube, down tube and seat tube comprise the "main frame", or front triangle. Significant alignment issues are uncommon from this part of the bike. If this part of the frame has become bent, repair is especially difficult, and is not generally recommended. The axis of the head tube should be parallel to the axis of the seat tube. One method to determine this is a frame table, typically used by frame builders. This is a "surface plate", on which the bike frame is mounted. A series of measurements are taken to determine alignment. It is the most accurate method for checking alignment.
An alternative and practical method uses an angle finder. Simply mount the bike in a repair stand, or even lean bike against a wall. Measure and note the head tube angle. Compare this to the seat tube angle. If the two are within a degree, the bike should be adequately aligned. For example, if the head tube reads 89-degrees, the seat tube should read between 88 and 90-degrees.
Repair of a mis aligned front end is difficult, and is likely to involve extensive force and possibly more damage. It is generally not recommended. Typically, a large mandrel is placed in the head tube. The bottom bracket is held secure in a vise. The head tube is twisted in a direction to counter the alignment problem. This repair is rarely successful, and the bending places a torsional or twisting load on the top tube and down tube, especially at the joints. Inspect this bike often for failure of joints. |
|
Frame Failure The bicycle frame tubing and joints may in some cases fail or break. In some cases, a joint may be poorly made, or the design may simply too weak for the use. Failure may also be the result of a crash, causing the tubing joints to yield and begin failing. The repeated stress of riding results in a "stress cycle", which may cause cracks and eventually failure. It is also possible that an attempt to repair a bike by re-bending tubing causes failure. Repair of severely bent tubing from a crash is often impossible or very impractical by re-bending. In welded frames, tubing can sometimes be replaced. If the frame is aluminum, it will often require heat treatment after repair to restore strength lost from the welding of the tubing. Bonded frame repair is best left to the manufacturer. Bicycle frames are best inspected during cleaning. Most types of paint tend to be somewhat brittle and will crack if the material has moved under it. The left image below shows a crack at the bottom bracket shell. The first indication was paint showing the failure. An inspection inside confirmed the crack. The second image is a crack in the left chain stay.
Composite frames are also susceptible to failure. In the frame below, a metal bottom bracket sleeve was bonded into the frame. This sleeve has loosened from the frame and is creaking.
The downtube of the frame seen below shows signs of a front impact. The tube has a wrinkle under the lower side. The properties of the metal in this damaged area have changed. This tube will likely crack at this point and eventually fail. The damage in this bike is not repairable other than by tube replacement.
The stress of flexing fork legs is transmitted to the fork crown. This crown has cracked at the narrow material above the brake caliper mounting hole. Fork failure is especially dangerous.
|
| Information and photos are courtesy of Park Tool. Visit their site at ParkTool.Com |
Campagnolo Derailleur Parts, Tools, Maintenance and Tool Use Tips:
|
| 100% Satisfaction Guaranteed
At Branford Bike we want you to be happy and satisfied with everything you purchase from us. We understand that sometimes you will need to return a product because it was not quite what you wanted. You may return anything you purchase from us within 60 days and unused, for an immediate exchange or refund. |
| Click on the underlined text to go to the... |
|
Page 17 Dropout Alignment |
Hubs Table of Contents |
Branford Bike Catalog Main Table of Contents |
Next Section Campagnolo Components |
|
Branford Bike Catalog Index Quickly find an item or see everything that is in our catalog. |
|
Order Online via our Secure Order Form and receive FREE expedited processing with email confirmations.
Our Secure Order Form is easy to use. Simply fill in the boxes as you would for a traditional paper catalog
order form.
|
|
Branford Bike Online Catalog - Archival Edition brought to you by the former owner of Branford Bike, Tim Brockett via his personal web site, TimsLife.Com |
|
This is an archival edition of the Branford Bike web site from February 2006. Complete with product photos, prices, how to articles and technical specifications it is a treasure trove of accurate, detailed and historical information. In July of 2006 Branford Bike was incinerated by a huge forest fire. No one was hurt but the inventory and buildings were completely destroyed. I witnessed the fire and stayed until the trees were burning in my driveway. At that point I hiked from Branford Bike, through the smoke and embers, down the mountain to my Jeep 3 miles away. I took photos and wrote about the harrowing experience so everyone could see what I saw. My insurance was generous and I later rebuilt my home and started another business selling books. Read the story here. Branford Bike was a huge part of my life for over 30 years; June 1976 to July 2006. I enjoyed those years tremendously and Branford Bike was often a labor of love. I hope you enjoy browsing through the archival catalog. If your visit brings back pleasant memories please share them with me via e-mail at timbrockett@gmail.com . If you find any printed Branford Bike catalogs, advertisments or flyers please scan them as a PDF and email. Or you may mail them via US Post to Tim Brockett, PO Box 1711, Emigrant, MT 59027. Eventually I will post them in a Memorabilia catalog section. Many Thanks and Best Wishes, Tim Brockett |
| Go to our Secure Ordering Page |
|
For more information, call: (203) 488-0482 Our phone hours are: Monday, Wednesday & Friday, 12 noon - 3 pm Mountain Time To print this page in Netscape Navigator or Microsoft Explorer: |