Handlebar wrapping is a skill that takes practice and patience. See
advanced tips below if you are experienced. Begin by washing your hands, or
wear mechanics gloves such as Park Tool MG-1 Nitrile gloves..
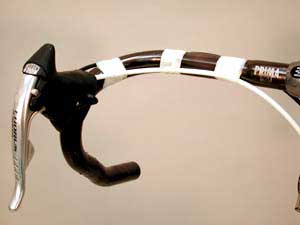
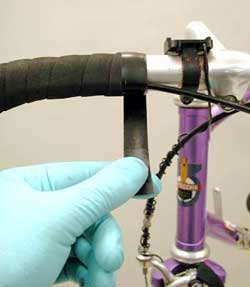
The finished job should be neat and clean. Make sure any housing
that is to be under the bar tape is secure. Use nylon strapping tape to hold the derailleur and brake
housing in place.
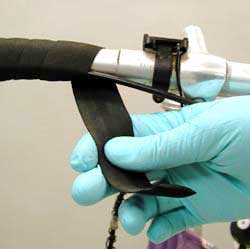
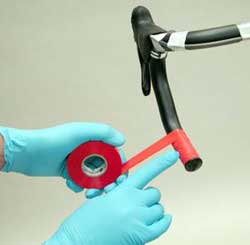
Start wrapping at the bottom of the bar. Begin so the tape extends about 3/4 of an inch past the bar end. This extra tape is then stuffed into the bar when the bar plug is inserted after the wrapping is completed. The direction of the wrap may also effect how it retains it tightness on the bar. Most cyclists tend to pull back on their hands when riding on the top section of the bars. Wrap the bars so the rider will always tighten the tape.
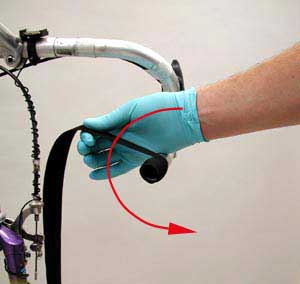
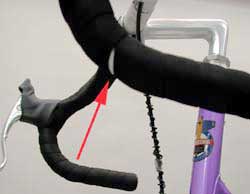
Looking from the seated rider's point of view wrap each side so the tape rotates inward from the top.
In other words, wrap the right bar counter-clockwise and the left bar
clockwise. Note the photo below.
If your bar tape tape has an adhesive backing, overlap the tape so the adhesive is always on the
bar.
Handlebar tape varies in strength. If you are
unfamiliar with the brand, assume it is fragile. It is important to maintain a tight
bar wrap by pulling the tape as you go. Too much force will break the tape so use a firm and gentle pull.
You can also work the tape by pulling and unwrapping until it is smooth and even.
Inspect your tape as you wrap. It is easy to miss a spot under bar's curve.
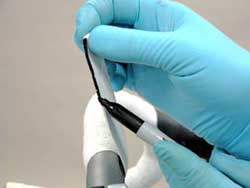
Cut a piece of tape about 6 inches long to use around the brake lever bar clamp band.
Pull the brake housing cover away from the bar and place the tape over the lever clamp. Continue to
wrap up and around the small piece and the lever, plus one or two addition
wraps past the lever. Fold the hoods back and inspect the tape. An older
method useful with very thin tape, like Benotto, was to make a "figure-8", wrapping
around the lever then back down and around again. The figure 8 method is too bulky for most modern tapes like Cinelli Cork or Brooks Leather.
Another way to wrap around the brake lever is simply to wrap past it without
the extra tape. This method is common among race mechanics. The extra
piece of tape does not add to comfort and is not necessary for a
functional wrap.
The length of bar tape in a roll varies. It is best to assume that the roll will be short, and wrap the low
section with less overlap. Increase the overlap on the upper section where your hands will spend more time.
You can always unwrap the tape and start over again.
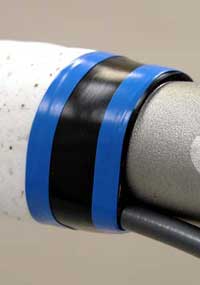
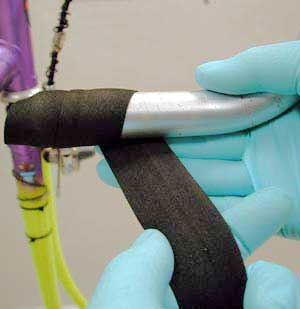
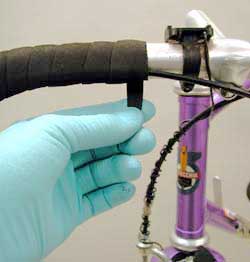
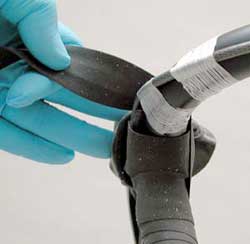
Mark where you want to end the tape on your bar. Continue the angle of wrap and continue wrapping past the ending point. In the picture below, the tape should end at the sleeve.
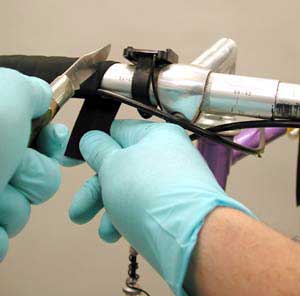
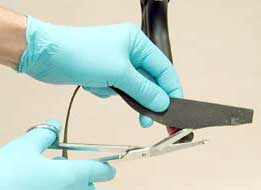
Use a sharp knife and make a superficial cut in the tape ONLY along the
ending line. Be careful not to scratch or score the aluminum handlebar as this will weaken it.
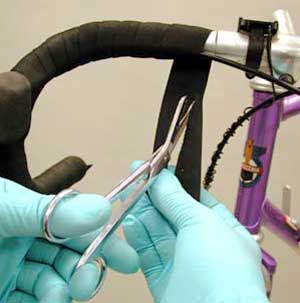
Back tape off two wraps and use scissors to extend the cut all the way
through the tape. Maintain the line shown by the cut and cut the tape
cleanly.
Finish wrapping the tape. Cut the tape so the end is at the bottom of your handlebar.
Use Cafe or Le Tour Finishing tape to end your wrap. We often use Cafe tape and then add a Le Tour finishing strip for extra security and great looks.
We do not recommend electrician's tape because it will slip and eventually fall off.
Advanced Tips
There are several different methods for wrapping handlebars.
One useful technique is to use a double-sided sticky tape on the lower 5-8 cm of the bars.
This is where bars become damaged from falls and abrasions.
The sticky tape will help hold the bar tape when it is crashed or torn.
An alternative to overlapping the tape at the end of the bar is to
first install the bar plug. Then cut a taper at the end of tape. This provides the tape with a smooth and even beginning.
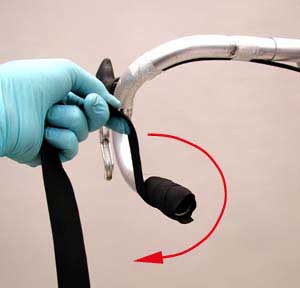
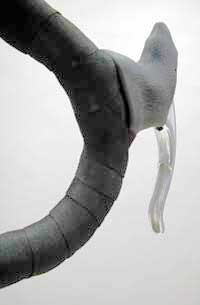
When riding on the drop section of the bars, most riders tend to rotate their hands outward. It is possible to reverse the wrap direction from start to finish to match this tendency. The photo below below has
the tape beginning opposite of the way we first described.
Wrap each side
so the tape rotates outward from the top. In other words, wrap the right
bar clockwise and the left side of your bar, counter-clockwise.
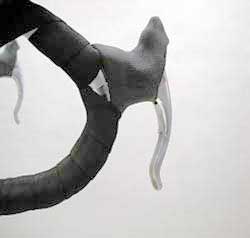
Using the method above, you must reverse the direction of
the wrap at the brake levers. Do not cross the back of lever from outside
to inside. Stay on the inside of the lever and
continue to above the lever as depicted in the photo below.
Notice the optional
piece of brake lever bar tape is in place. The tape will now be in a
self-tightening direction on the top and the bottom of the bars. This is the way we wrap all our handlebars.
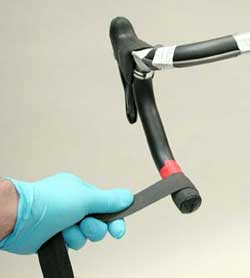
Even a well-trimmed tape end can show underneath the finishing tape. We color the edge of the bar tape with a magic marker. The photo below shows the tape edge colored black.
Add some thin Cafe Finishing tape for color contrast. Make "pin striping" by cutting a
roll of tape with a sharp knife or razor blade. Lay the roll of tape on a
flat surface. Firmly press the blade into the roll, and CAREFULLY rotate the roll.
Be careful not to cut your fingers. Peel the tape and apply to the first layer of finishing tape.